Getting Started
Understanding Home and Teams
On your dashboard, you will find Home and Teams, where Home is for your personal drawings and Teams are for your team drawings. It is strongly recommended that you should start by creating a team.

Why you should create a team
Creating a team would let you add team members, where all subsequent drawings created in the team would be automatically shared to all members. This drastically improve productivity and reduce the amount of effort required to share drawings with your team.
Even after a team is created, you can still add or remove members to ensure your new member get access to all drawings automatically.

Team members can be set to differing permissions (owner, edit and share, view only), where all subsequent drawings will continue to inherit these permissions.
In addition, each and every drawing in the team can be further customized to have different permissions. For example, all drawings are available to members except 3 drawings, which are viewable and editable only by certain members.
Understanding the editor
The editor is divided into stencils on the left and drawing area on the right, where stencils are a collection of symbols which you can drag and drop onto your drawing. Most symbols are designed to display multiple forms, so please do right click and explore options.

See also
How to create a new drawing
Users can create a new drawing from the dashboard by using the Create button, or use a template by clicking on the template's New button.

We recommend using a template as it can be customized to load their own stencils and content, for easier and faster completion of circuits.
How to create circuits
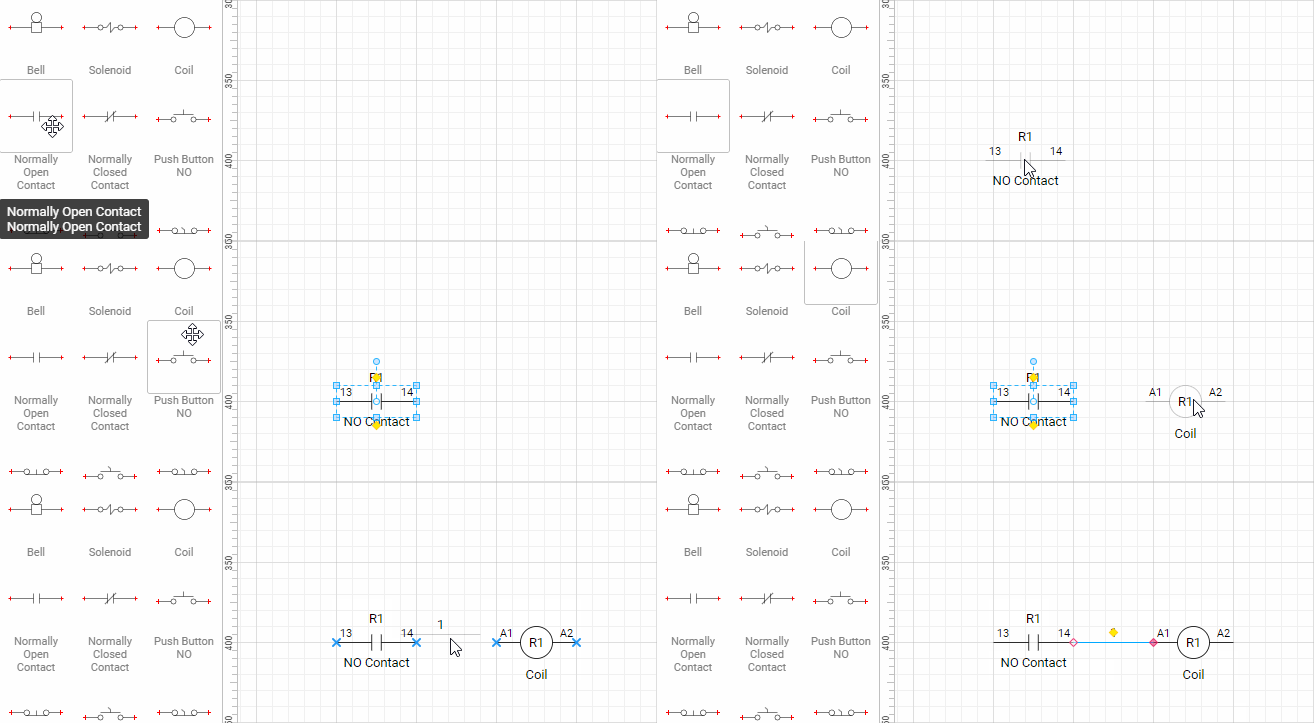
Creating circuits is as simple as dragging and dropping symbols from a stencil onto your drawing. All wires and symbols will be automatically and incrementally renamed to the next sequential number.

Real time cross referencing
To view real time cross reference or to edit a symbol, double click or right click on the symbol or wire and you will be able to access the Edit reference or the Wire name window.

How to reposition text
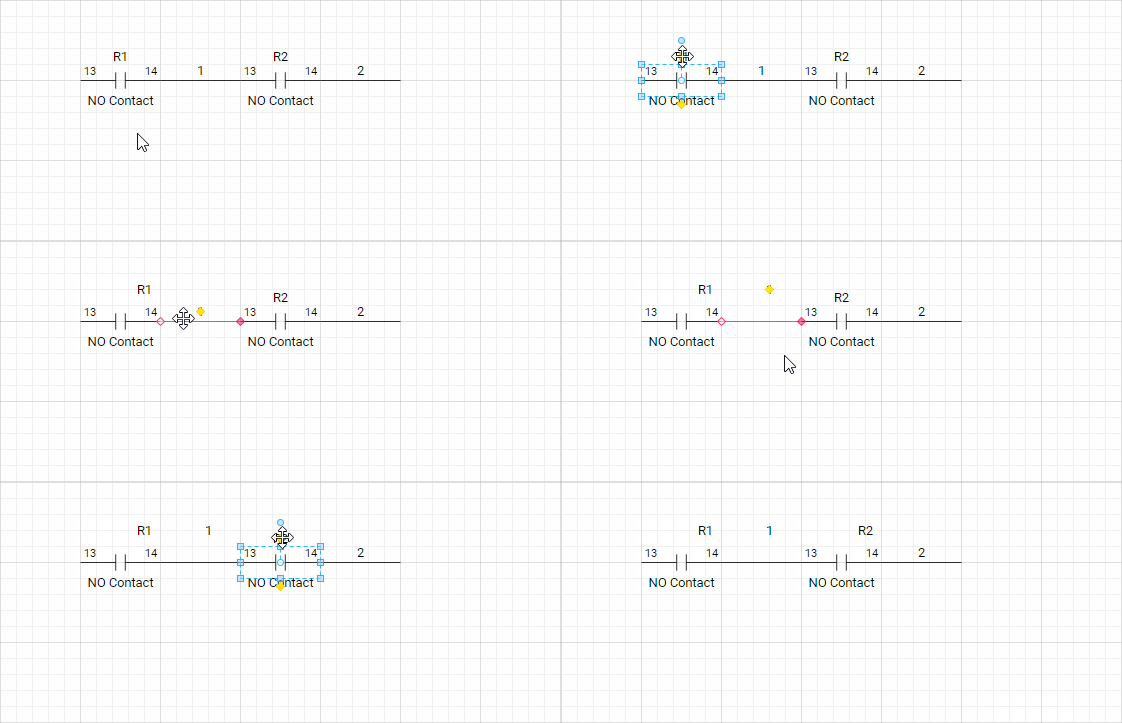
Symbols and wires in Capital X Panel Designer have yellow control handles that allows you to reposition texts easily by dragging on their yellow handles.

How to use connection points
Connection points allow a shape to connect to another. In Capital X Panel Designer, connection points allow wires to be connected to symbols.

Connection points are only visible when you attempt to connect a shape to another using wires or connectors. These connection points will only be shown on the editor, and will not be printed on hard copies.
Automatic connection points on wires
When a wire is dropped on another, Capital X Panel Designer automatically creates a connection point, connects the wires together, and inserts a connection dot to denote a connection. When a wire is moved away, Capital X Panel Designer automatically deletes the connection points. Connection dots can also be manually turned on or off by right clicking on a wire.

In addition, you can easily add connection points to any shape by first clicking on a shape, then clicking on the connection point tool, and then pressing CTRL key and clicking on anywhere you would like to add a connection point.

Creating and using title blocks
Capital X Panel Designer includes powerful title block shapes that let users generate Table of Contents and modify information that affects a page or the entire document.
Drag and drop intelligent title block shapes from the Title Block stencil or create your own shape by using menu Capital X Panel Designer | Title Blocks | Insert Title Block Data.

Once you have placed all necessary title block shapes, group them together and click menu Capital X Panel Designer | Title Blocks | Create Title Block, and Capital X Panel Designer will automatically insert data and intelligence to create your custom title block.
To use your custom Title Block, simply drag and drop them onto your drawing and Capital X Panel Designer will automatically center your title block. Right click on your title block and select Edit Title Block to edit title block information.
How to use page prefixes
One of the most powerful tools in Capital X Panel Designer is page prefix and users can use them on both symbols and/or wires. Page prefix adds a page number in front of your symbol reference or wire name and automatically keeps track and updates this page number even when you re-order your pages, all automatically.
