October 01, 2020 · Capital X Panel Designer · Electrical CAD
Electra's Innovative Symbol Generator
We are now part of Siemens’ family. Electra Cloud is now Capital Electra X and Electra E9 is now Capital Electra 2210.
Although we have included a myriad of symbols in Electra, sooner, rather than later, users will definitely find the need to create their own symbols for their electrical cad drawings.
It's easy to draw and create a symbol in Electra, but if you want even simpler symbol creation, you can use the PLC module shape, which is essentially a symbol generator.
How's that? Doesn't the PLC module generates a PLC module? Well, it does, and much more. To understand why you can use the PLC module to generate ANY symbol of your own, first you need to understand symbols.
A symbol is only a representation of real world components. Therefore, a single contactor symbol can be used to represent contactors of all sizes and from various manufacturers.
It is for the same reason, symbols in Electra contains a link to the real world components they represent, and this link can be easily changed and updated using menu "Manage Components". So essentially, you can drop two contactor symbols, but assign one of them to be a Siemens contactor while assigning the other to an ABB contactor.
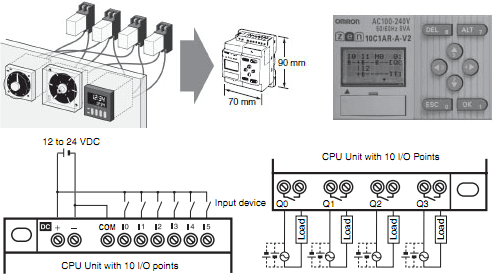
If you use the PLC module to generate two symbols, the same logic applies, where you can assign one symbol to be a mini controller from Omron and the other a PLC from Schneider, or any other real world components for that matter. In this post, we will be talking about creating a symbol for the mini controller, the Omron ZEN V2 , using the PLC module generator.

The first step is to drop a 2 sided PLC module shape onto the drawing and right click to select "Set PLC module". Then key in the Omron ZEN's input and output pin names as shown below:
Once generated, right click to select "Horizontal", "Rotate Label Orientation" and you would have the symbol below:
Notice that the reference and description of this symbol still says "PLC", and this would have to change.
Click on the symbol, then click "Create Symbol" on the toolbar and modify as shown below:
Then click on the component tab, and create an Omron ZEN component by clicking on the Component Database button. After creating the component, click on the "Select" button and find the component that you have just created, select it and make sure the symbol is now linked to the component you created as shown below:The click on the "OK" button and your symbol will be saved into a new stencil.
Drag and drop your newly created symbol from your stencil onto your drawing, drag on the handle to rotate your symbol left 90 degrees and you will have the below:
And there you have it. Everytime, you drag your symbol from your stencil, this symbol will now be linked to an Omron ZEN component instead of the original PLC. And that's how you use the PLC module to generate ANY symbols of your own easily.
Try it out, and let us know how it goes or if it helps.
P/S: This post is inspired by the great drawings done by Jason Caruana from InterElectrical, Australia. Thank you Jason!


